

Assistive Listening Classroom Systems: A School Buying Guide
- 23 Oct, 2026
An assistive listening classroom system delivers a teacher’s or classroom audio source’s signal to students through personal listening equipment, helping reduce the listening challenges caused by distance and background noise. Choose a system around the students’ listening needs, the lesson’s audio sources, and the number of simultaneous users—not simply the room’s seating capacity. Start with our assistive listening systems, then use the checklist below to compare classroom workflows and kit contents.
Key takeaways
- Personal listening systems and classroom loudspeakers serve different purposes; identify whether students need individual audio access.
- Receiver counts should reflect simultaneous users and your checkout plan, while accessibility requirements need a separate review.
- Neckloops support telecoil-equipped hearing aids, but compatibility must be checked for each student.
- Plan for teacher speech, student questions, and media audio—not just a single lecture microphone.
- Test the complete listening path in the actual classroom before putting a system into regular use.
How an Assistive Listening Classroom System Works
A typical personal wireless listening setup has an audio source, a transmitter, receivers, and a listening interface. The source might be a teacher’s microphone or an audio feed from classroom equipment. The transmitter sends that audio to compatible receivers, which provide it through an appropriate listening accessory.
The practical goal is to give the listener a more direct path to the intended speech. That differs from turning up a room’s loudspeakers: personal listening delivers a separate audio feed rather than relying entirely on sound traveling across the classroom.
What is an FM system for classrooms?
An FM system for classrooms uses frequency-modulated radio transmission to send audio from a transmitter to compatible receivers. Transmitter and receiver settings must work together. A school evaluating multiple nearby rooms should plan channel use and test operation with neighboring systems running.
Do not assume every wireless classroom product uses the same technology or works with existing receivers. Confirm the transmission method and compatibility before combining equipment from different systems.
What reaches the student matters
A teacher microphone carries the teacher’s voice, not automatically every voice in the room. During discussion, student questions need their own pickup strategy, such as an appropriate shared microphone or teacher repetition. Likewise, a video’s audio needs a planned connection if it is to reach personal receivers.
Compare Classroom Hearing Assistance Approaches
Schools may need personal listening, room amplification, or both. This comparison describes general approaches, not the included features of every kit linked below.
| Approach | Audio path | What to check |
|---|---|---|
| 📡 Personal FM listening | ✅ Radio transmitter to compatible personal receivers | ✅ Receiver compatibility, channel coordination, and listening accessories |
| 🔊 Classroom sound-field amplification | ✅ Microphone through loudspeakers into the room | ✅ Room acoustics and whether individual listening support is also needed |
| 🧲 Receiver with a neckloop | ✅ Compatible receiver through a neckloop to a hearing aid’s telecoil | ✅ Receiver connection, telecoil availability, and student-specific setup |
| 📶 Infrared listening | ✅ Infrared transmitter to compatible receivers | ✅ Room coverage and obstructions in the infrared signal path |
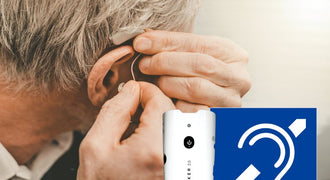
A neckloop is a listening interface, not a separate radio transmission system. It creates a magnetic audio signal that a compatible telecoil can receive. A hearing aid’s Bluetooth capability alone does not establish neckloop compatibility.
Define Student Needs Before Choosing Equipment
Assistive listening devices for students should be evaluated around actual use, not only a product’s audience-size label. Involve the student, relevant school staff, and the student’s hearing professional when selecting the listening interface and checking compatibility.
Student and lesson checklist
- Identify who will use a receiver during the same lesson or event.
- Document existing hearing devices and the intended audio connection.
- List required sources: teacher speech, classroom discussion, videos, or guest presenters.
- Decide whether equipment stays in one room or moves with the student.
- Choose who will help with setup, listening checks, and troubleshooting.
- Plan how students can report missing audio or an uncomfortable listening level.
Keep classroom participation in view. A system that carries the teacher clearly but leaves group discussion out of the audio feed has an incomplete classroom workflow. Include turn-taking and microphone handoffs in the teaching plan.
Room and school checklist
- Identify adjacent classrooms using wireless audio equipment.
- Check the proposed transmitter location and available source connections.
- Test audio at actual student seats and other intended listening locations.
- Assign a secure storage and receiver checkout location.
- Establish cleaning, power-management, and return procedures appropriate to the equipment.
Choose an Assistive Listening Kit for Your School
The following options offer different receiver counts, neckloop arrangements, and warranty descriptions. These are purchasing distinctions—not a determination of what a particular school must provide.
Four receivers for a smaller listening group: ALC-4P
The 4-person Enersound assistive listening system with ADA plaque includes four compact, lightweight receivers and an ADA plaque. It carries a 3-year limited warranty and is described for classroom and other small-venue uses.

Consider this package when four receivers match the intended simultaneous users. The NKL-402 neckloops are sold separately, so include that accessory decision in your review if students will use telecoil-equipped hearing aids.

A larger receiver pool: ALC-10P
The 10-person Enersound assistive listening system with ADA plaque is listed as a multichannel system operating in the 72–76 MHz band. The product description states that it can be expanded with additional R-100 receivers and neckloops.


Neckloops are not included. This makes accessory planning especially important if your school needs both receiver-based listening and telecoil access. The product is listed with a 3-year warranty.
Ten receivers with neckloops: ALS-10TP
The 10-person assistive listening system with neckloops and ADA plaque includes ten receivers, neckloops for telecoil-enabled hearing aids, and an ADA plaque. It is listed for uses including large classrooms and auditoriums and carries a limited lifetime warranty.

Consider this option when included neckloops are part of your purchasing priorities. Confirm the accessory quantities and each student’s hearing-device compatibility before finalizing the order.
Product pages show current pricing. Compare the complete proposed configuration, including listening accessories, storage choices, and any connections needed for classroom audio.
Set Up a Classroom Trial Before Deployment
A practical trial should follow a real lesson rather than a brief equipment demonstration. Use this sequence to uncover missing audio sources and unclear staff responsibilities.
- Confirm the audio path. Identify the microphone or source, transmitter, receiver, and student listening interface.
- Check speech. Have the teacher speak normally while the listener checks audio from the intended seating area.
- Add classroom media. Play a typical instructional clip through the planned connection.
- Practice discussion. Test how a student question reaches the receiver.
- Check nearby rooms. Operate neighboring wireless systems during the trial where relevant.
- Document the routine. Record settings, equipment assignments, and the person responsible for support.
Repeat the check when the room arrangement, teaching format, or audio equipment changes. Ask the student about usability as well as whether sound is present.
Plan Hearing Assistance Across Schools and Events
Hearing assistance in schools can involve daily instruction, assemblies, family meetings, and visiting speakers. Decide whether classroom equipment will remain assigned or be checked out for events, and avoid scheduling the same receiver pool for overlapping uses.
Keep equipment selection separate from the school’s accessibility review. An ADA plaque identifies the availability of assistance; it should not replace checking the complete arrangement with the people responsible for accessibility planning.
Frequently Asked Questions
Is classroom amplification the same as assistive listening?
No. Sound-field amplification sends speech through room loudspeakers. A personal assistive listening system sends audio to individual listening equipment. Evaluate the student’s needs before deciding whether one approach or a combination is appropriate.
Can students use these systems with hearing aids?
A compatible receiver and neckloop can deliver audio to a telecoil-equipped hearing aid. The ALS-10TP includes neckloops; the ALC-4P lists NKL-402 neckloops separately, and the ALC-10P does not include neckloops. Check the student’s hearing device before ordering.
How many receivers should a school buy?
Start with simultaneous users, then consider overlapping classes, event needs, and your checkout process. The featured packages offer four-person or ten-person options. Review applicable accessibility obligations separately rather than treating package size as a compliance calculation.
Can the ALC-10P support additional listeners later?
Yes. Its product description states that the system can be expanded with additional R-100 receivers and neckloops. Confirm the complete accessory configuration when planning the expansion.
Will a teacher microphone also carry student questions?
Not automatically. The listening feed contains what its connected audio sources capture. Plan a discussion microphone workflow or have the teacher repeat questions so those contributions enter the audio feed.
What should staff check before each class?
Check equipment power, compatible transmitter and receiver settings, the intended source connection, and the student’s listening accessory. Perform a brief listening check and confirm how the student will request help if audio stops.
Build your shortlist around student compatibility, classroom audio sources, and manageable daily routines. Explore the full range of assistive listening equipment for classrooms and school venues to compare available configurations and current pricing.